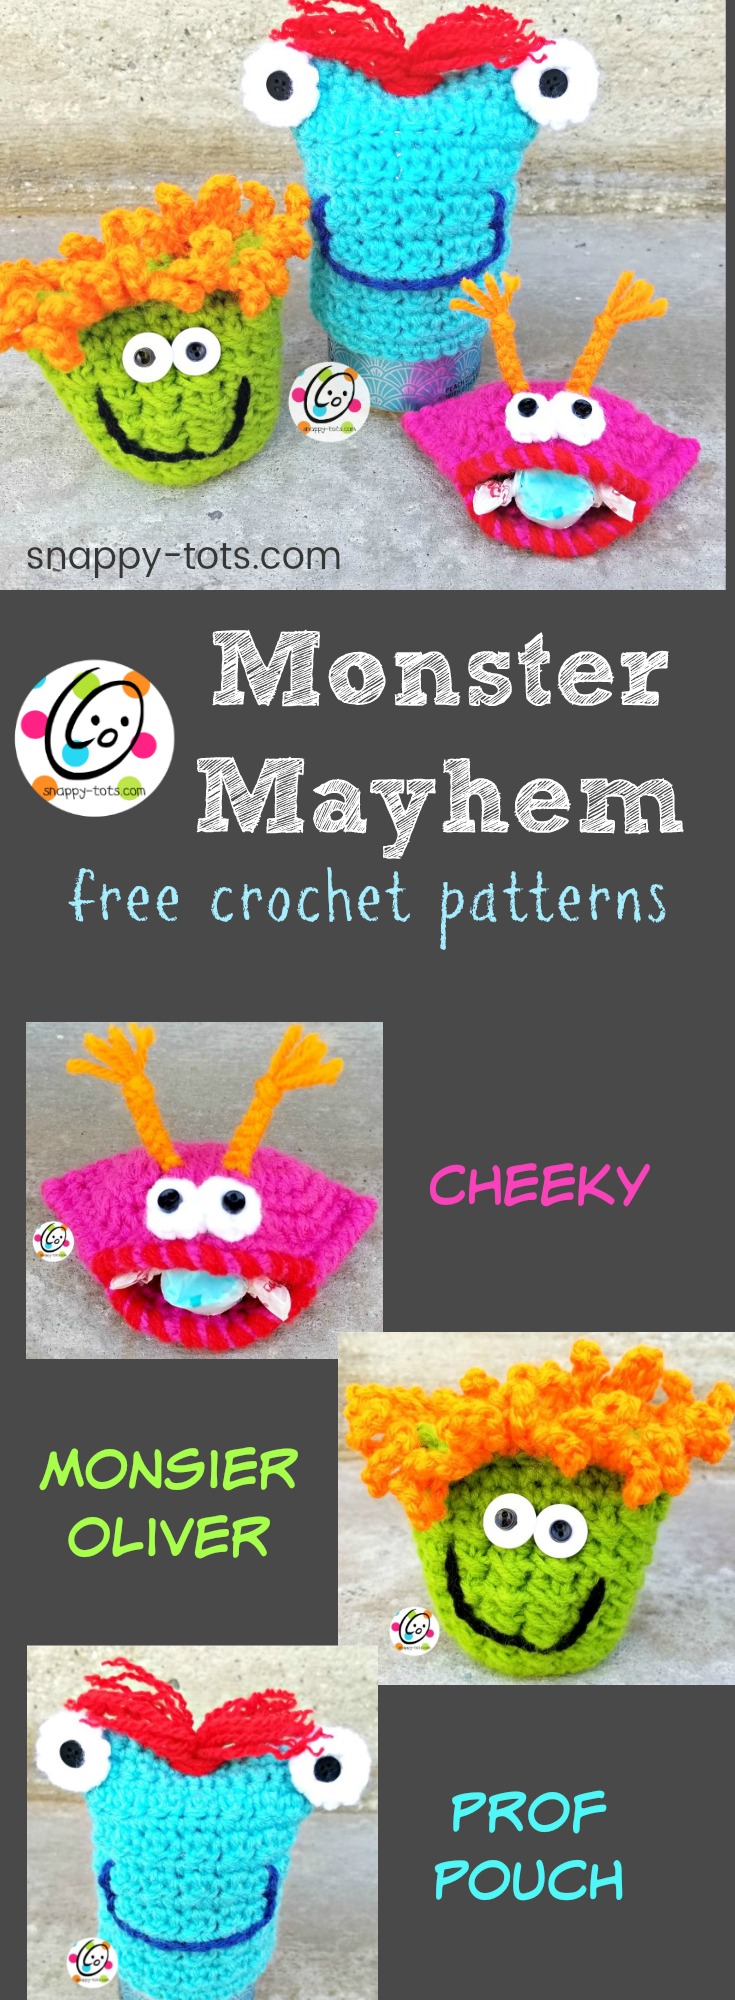
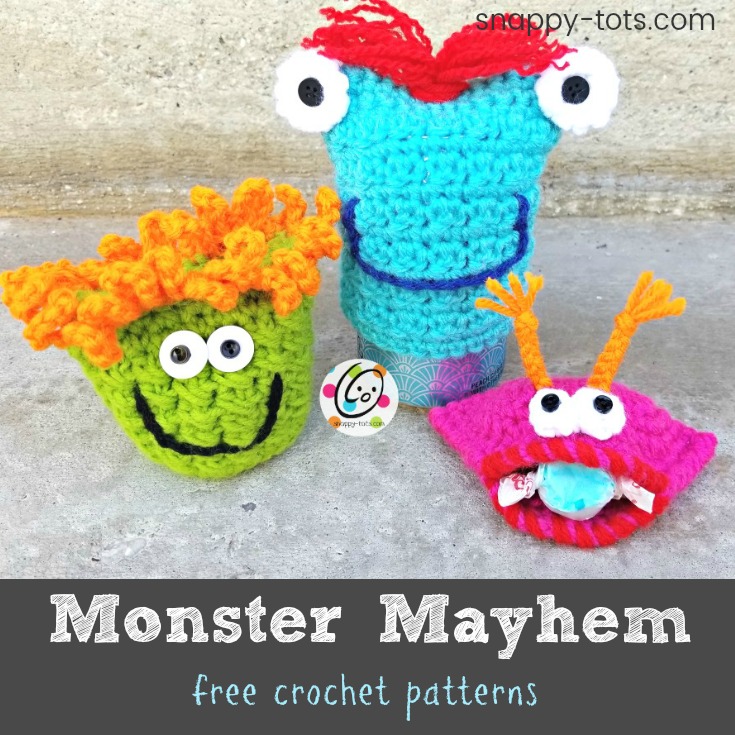
Free Patterns: Monster Mayhem
We all can use a boost of happiness so how about whipping up some of these little monsters to leave around for your little monsters… or as a special surprise for someone having a monstrous day.
Let’s Spread Some Monstrous Happiness!
I hope these three make you smile 🙂 I hope you will join my Monster Mayhem and make some to spread some cheer too.

Monster Mayhem Challenge
Make one (or many) of any of these little monsters. Each of these can be made to hold things or as stuffies.
Here are some suggestions for being part of the mayhem:
- Keep the little guy for yourself and take it on adventures throughout the month of July.
- Attach one of the notes below (or make your own) and give to a friend. Whether you stuff the little friend or fill with a small treat, it is sure to bring smiles.
- Attach a note and leave a little monster for a surprise.
- The blue guy could slip over a rock to greet strangers along a path.
- Great in gift baskets and party favors.
Please include #monstermayhem and/or #snappytots when sharing pix on social media. Let’s try to spread as much happiness as possible.
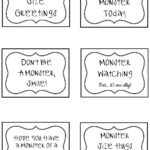
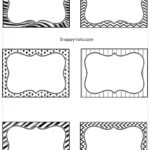
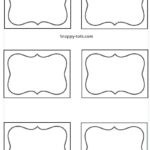
Tag Printables
Click on the graphics below to download a printable pdf file.

Monster Mayhem Patterns
An ad-free, downloadable PDF is available for only $2. It includes all three monsters.
Materials Yarn: worsted weight in a variety of colors. Sample yarns: Red Heart Super Saver in Pumpkin, Spring Green, Turqua, Cherry, Royal, Shocking Pink, White, Black Crochet Hook: H Miscellaneous Supplies: Yarn needle, sewing needle, black thread, 2 small black buttons per monster, small amount of stuffing (optional), 2 large white buttons (optional for Oliver’s eyes)
Details Finished Measurements: Cheeky (pink): 5” wide x 3” deep Monsier Oliver (green): 2.5” across base x 3.5” tall Professor Pouch (blue): 4” wide (5.25” wide with eyes) x 4.25” tall
Tips First stitch of each row is worked into the same stitch as the turning chain. Numbers at the beginning of each line may refer to steps and not indicate number of rows. Instructions are written with color changes as shown in sample. Substitute colors as desired.
Professor Pouch
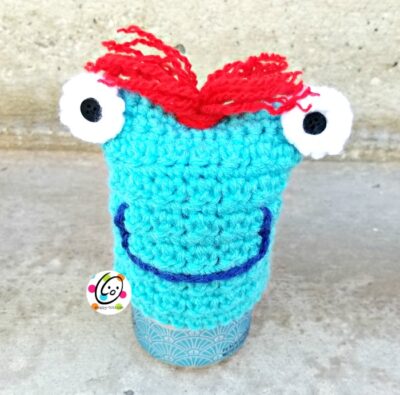
This tall guy makes a great buddy to slip over a gift for a friend (such as a can of pop or cute bar of soap). He also can slip over a rock to surprise someone on their morning walk.
This project is created flat and then sewn together. Color changes for the patriotic version can be found at the end of this section.
- With an H hook and lt. blue yarn, ch 16, sc in 2nd ch from hook and in each ch across. (15sts)
- Ch 1, turn, sc in same st, dc in next st, *sc, dc*, repeat until 1 st remains, sc in last st.
- Ch 1, turn, sc in each st to end of row.
- Repeat rows 2-3 four more times (10 rows).
At this point there should be 5 ridge sections and 11 rows.
- Ch 1, turn, 2sc in same st, *dc in next st, sc in next st*, repeat until 1 st remains, 2sc in last st. (17sts)
- Ch 1, turn, 2sc in same st, sc 15, 2sc in last st. (19sts) 7-8. Ch 1, turn, sc in each st to end of row.
- Ch 1, turn, sc2tog, sc 15, sc2tog. (17sts)
- Ch 1, turn, sc2tog, sc 13, sc2tog. (15sts)
- Ch 1, turn, sc in same st, dc in next st, *sc, dc*, repeat until 1 st remains, sc in last st.
- For this row, choose from one of the following options: Regular: Ch 1, turn, sc in each st to end of row. Continue to step 13 (skip the “straw holder option”).
STRAW HOLDER OPTION: One of my awesome testers (JoAnne of GrammyJo Lids) suggested making a hole to insert a straw so it could be slipped over a pop can and he can scare away the bugs and drink too 🙂 For this option follow these instructions for steps 12 and 13 instead:
12. Ch 1, turn, sc 6, ch 3, sk 3, sc 6.
13. Ch 1, turn, sc in same st, dc in next st, sc, dc, sc, dc, work 3 sc around ch, sc, dc, sc, dc, sc 2. Continue to step 14 below.
- Ch 1, turn, sc in same st, dc in next st, *sc, dc*, repeat until 1 st remains, sc in last st.
- Ch 1, turn, sc in each st to end of row.
- Repeat rows 13-14 four more times (8 rows). Finish off, leaving a long tail for sewing a side seam. Notice one side is bumpier than the other. Fold piece in half so the bumpier sides are together and side seams and short ends are lined up. With a yarn needle and yarn tail, sew the side seam together. Sew the opposite side together with matching yarn. Turn piece right side out. The center “points” are where the eyes will be sewn.

Patriotic (or stripes of any color) Version
- With an H hook and red yarn, ch 16, sc in 2nd ch from hook and in each ch across. (15sts)
- Ch 1, turn, sc in same st, dc in next st, *sc, dc*, repeat until 1 st remains, sc in last st.
- Change to white yarn. Ch 1, turn, sc in each st to end of row.
- Ch 1, turn, sc in same st, dc in next st, *sc, dc*, repeat until 1 st remains, sc in last st.
- Change to red yarn. Ch 1, turn, sc in each st to end of row.
- Ch 1, turn, sc in same st, dc in next st, *sc, dc*, repeat until 1 st remains, sc in last st.
- Repeat steps 3-6 once. There should be 3 red stripes and 2 white stripes when this section is complete.
At this point there should be 5 ridge sections and 11 rows.
- Change to blue yarn. Ch 1, turn, sc in each st to end of row.
- Ch 1, turn, 2sc in same st, *dc in next st, sc in next st*, repeat until 1 st remains, 2sc in last st. (17sts)
- Ch 1, turn, 2sc in same st, sc 15, 2sc in last st. (19sts) 11-12. Ch 1, turn, sc in each st to end of row.
- Ch 1, turn, sc2tog, sc 15, sc2tog. (17sts)
- Ch 1, turn, sc2tog, sc 13, sc2tog. (15sts)
- Ch 1, turn, sc in same st, dc in next st, *sc, dc*, repeat until 1 st remains, sc in last st.
-
For this row, choose from one of the following options: Regular: Ch 1, turn, sc in each st to end of row. Continue to step 17 (skip the “straw holder option”).
STRAW HOLDER OPTION: One of my awesome testers (JoAnne of GrammyJo Lids) suggested making a hole to insert a straw so it could be slipped over a pop can and he can scare away the bugs and drink too 🙂 For this option follow these instructions for steps 16 and 17 instead:
16. Ch 1, turn, sc 6, ch 3, sk 3, sc 6.
17. Ch 1, turn, sc in same st, dc in next st, sc, dc, sc, dc, work 3 sc around ch, sc, dc, sc, dc, sc 2. Continue to step 18 below.
- Change to red yarn. Ch 1, turn, sc in same st, dc in next st, *sc, dc*, repeat until 1 st remains, sc in last st.
- Ch 1, turn, sc in each st to end of row.
- Change to white yarn. Ch 1, turn, sc in same st, dc in next st, *sc, dc*, repeat until 1 st remains, sc in last st.
- Ch 1, turn, sc in each st to end of row.
- Change to red yarn. Ch 1, turn, sc in same st, dc in next st, *sc, dc*, repeat until 1 st remains, sc in last st.
- Ch 1, turn, sc in each st to end of row. Finish off, leaving a long tail for sewing a side seam. Notice one side is bumpier than the other. Fold piece in half so the bumpier sides are together and side seams and short ends are lined up. With a yarn needle and yarn tail, sew the side seam together. Sew the opposite side together with matching yarn. Turn piece right side out. The center “points” are where the eyes will be sewn.
Eyes (make 2)
1. With an H hook and white yarn, create a magic circle of 5 sc sts (or preferred method for creating a circle of 5 sc sts), pull closed and place a marker for working in the round. (5sts)
2. 2sc in each st to end of round. (10sts)
3. Sc in each st to end of round. Sl st in next st. Finish off and weave in ends. Place the right side (smoother side) of the eye against one pointy tip of the monster. Place a button on the center of the eye. WIth a sewing needle and black thread, sew the button to the eye and to the monster. This holds the white piece in place.
Mouth: With a yarn needle and dark yarn, stitch the mouth in place.
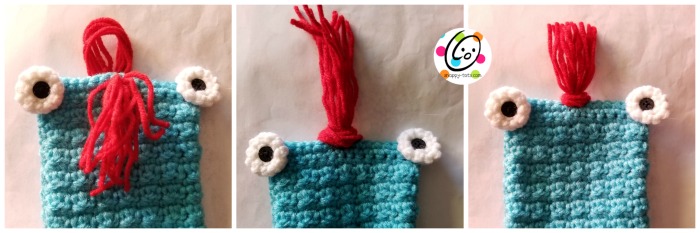
Hair Cut 6 pieces of red yarn 10” long. From the back of the monster, pull the center loops through a stitch at the top center. Pull the yarn ends through the loops and pull snug against the head. Trim the ends and pull apart for frizzy hair. See photos below.
Variations
Stuffie: If you would like turn make your Professor into a stuffie or beanbag, insert the filling and then use a yarn needle and matching yarn to sew the bottom edges together.
Opening at Top: Work rows 1-8 of main pattern. Place the two bumpy/right sides together. With a yarn needle and matching yarn, sew the side and bottom seams together. Turn right side out and add eyes and mouth. Sew the “hair” to the top edge of the back layer.
Monsier Oliver
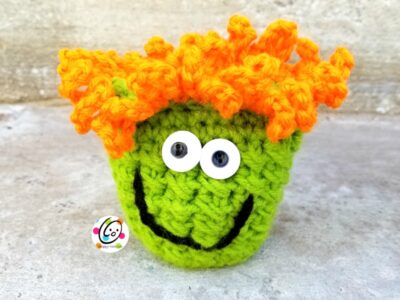
This crazy haired dude makes a great stuffy or candy holder. A small dixie cup is a great size to fit inside to hold your candy stash.
This project is worked in the round.
- With an H hook and green yarn, create a magic circle of 6 sc sts (or preferred method for creating a circle of 6 sc sts), pull closed and place a marker for working in the round. (6sts)
- 2sc in each st to end of round. (12sts)
- *2sc in next st, sc in next st*, repeat to end of round. (18sts)
- *2sc in next st, sc 2*, repeat to end of round. (24sts)
- *2sc in next st, sc 3*, repeat to end of round. (30sts)
- Work this round in BLO. sl st in next st, ch 1, sc in each st to end of round, sl st to join. 7-12. Ch 1, *sk 1, sc in next st, hdc in skipped st*, repeat to end of round, sl st to join.
- Ch 1, sc in each st to end of round, sl st to join.
- Ch 1, *sc 3, sc2tog*, repeat to end of round, sl st to join. (24sts)
- Ch 1, FPSC around each post from previous round. Finish off, leaving a long yarn tail for sewing top edge for making a stuffie (or weave in ends if top will be left open).
- Turn piece upside down, with bottom/starting edge away from you. With an H hook, attach orange yarn to one of the stitches on the top edge. Make sure you are working into the last round and not the sts from the previous round. *Ch 10, sl st in next st*, repeat to end of round. Finish off and weave in end.
Eyes: large white buttons and small black buttons were used for the eyes. Stitch those in place with a sewing needle and black thread. If crocheted eyes are preferred, follow instructions from the “Prof. Pouch” eyes.
Mouth: With a yarn needle and dark yarn, stitch the mouth in place.
Stuffie: If this will be stuffed, insert a small amount of stuffing in the bottom. Flatten the top edge, creating two layers. Make sure the eyes are center front. With a yarn needle and yarn tail at top edge, sew the two layers together.
Cheeky

This sweet monster can hold chocolate kisses and taffy in her cheeks for a fun surprise. She also could hold your rings while doing dishes or a secret stash for rainy days.
This project is created flat and then sewn together.
- With an H hook and pink yarn, create a magic circle of 8 sc sts (or preferred method for creating a circle of 8 sc sts), pull closed and place a marker for working in the round. (8sts)
- 2sc in each st to end of round. (16sts)
- *sc, 2sc in next st*, repeat to end of round. (24sts)
- *sc 3, 2sc in next st*, repeat to end of round. (30sts)
- *sc 4, 2sc in next st*, repeat to end of round. (36sts)
- Sc 9, *hdc 2, 2hdc in next st*, repeat 2 more times, sc 9, *hdc 2, 2hdc in next st*, repeat 2 more times. (42sts)
- Sc in each st to end of round.
- Sc 9, *hdc 3, 2hdc in next st*, repeat 2 more times, sc 9, *hdc 3, 2hdc in next st*, repeat 2 more times. (48sts)
- Sc in each st to end of round.
- Sl st in each st to end of round. Finish off and weave in ends.
Fold piece in half, matching up the hdc st sections at the top, rounded edges.
WIth a yarn needle and matching yarn, sew the layers together, leaving the center ⅓ unsewn. Tip: When sewing the layers together, insert the needle just below the sl st round. This creates a thicker seam.
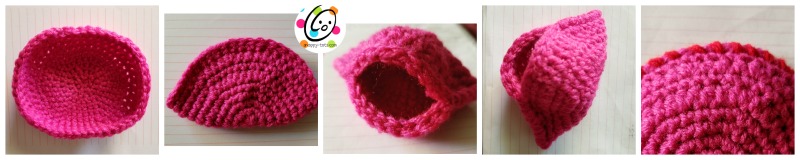 “Lips”: With a yarn needle and red yarn, stitch around the stitches of the open area.
Eyes (make 2)
1. With an H hook and white yarn, create a magic circle of 6 sc sts (or preferred method for creating a circle of 6 sc sts), pull closed and place a marker for working in the round. (6sts)
2. Sc in each st to end of round. Sl st in next st. Finish off, leaving a yarn tail for sewing to the monster. WIth a sewing needle and black thread, sew a button to each eye. With a yarn needle and the white yarn tail, sew each eye in place.
Braids (make 2) Cut 3 strands of orange yarn 8” long. Pull one set of ends through a stitch at the top of the head, approximately 1” behind an eye. Pull the other ends through another stitch near the first one. Divide the strands and TIGHTLY braid approximately 2”. Tie a knot in the end and trim strands.
Pin To Save For Later